A few months ago I got a feeling that I’d enjoy live streaming some coding. Not sure exactly, but it seemed to be somewhere along the lines of “sitting at home,” “not enough people around to complain to” and things like that. Plus it felt like it could spark some interesting discussions. Maybe. Also, this creates some time-based pressure to do smaller projects — because you’re doing that every Wednesday (or whenever). And doing small things outside of general job-related stuff makes me feel like a person with wider interests. Who am I kidding though, it’s all programming.
The issue here is that I can’t just start doing something suddenly. I can’t just buy a dishwashing machine — I need to read up on what are the current features and trends and qualities and select the one I like. It’s the same with streaming — I can’t stream using Macbook cam even though I’m going to sit in a little sector of a video. I need a better webcam so I can feel like it’s for real! So I set to research the topic.
Camera
And it turns out you can’t buy a good webcam. They are all shit — even if you pay $200+. If you want good picture quality the only way right now is to buy a photo camera with an HDMI capture card. All major brands have released drivers to connect cameras via USB, but those drivers are unanimously bad: USB2 can support compressed 1080p60, but those drivers only support 576p30. What is this madness I don’t know, so you have to use an HDMI capture card.
The capture card could either be some cheap thingie for $15 from Aliexpress, or an Elgato Camlink 4K for $130 (or other proper brand-name stuff for even more money). Initially I settled on a cheap crap and it works fine for now: it doesn’t support 4K, and 1080p is also questionable, but the resulting video quality is miles ahead of webcams and phones. After some time I realized that it oversaturates image a lot, so I have to turn down colors in camera and end up with almost a grey-scale picture - and bought Camlink 4K, and result is just great.
For a camera you have two non-negotiable properties:
- It should be able to work on AC power. Working on batteries and a charger is insanity when it’s a non-mobile working place.
- It should output the so-called “clean HDMI”. This means that HDMI output should contain whatever the camera sees but without all the technical information, which is present on a camera screen — like a shutter speed or a battery level.
The second one just out-ruled my otherwise excellent Fuji X-T1, because it outputs only recorded footage at the HDMI port. It was painful to realize, but I went to a local classified site and bought a used Sony a5100 for $250.
There are a few reasons why a5100:
- Sony’s autofocus is the best on the market.
- The sensor is good enough. I looked at dxomark results and they are almost the same as much newer a6400 and a6600 have.
- It has a flip-out screen that flips up 180° (sticking from the top of the camera). Excellent as a self-monitor, because it will work even if some of the components in the path fail.
- It’s dirt cheap. It’s an older model made for 6 years already.
I’d prefer to have Fuji — their colors are so much better to look at — but I wanted to keep investment low just in case in two months I decide I don’t need it all. And the cheapest Fuji setup would be 2x from a5100 — partially because Sony’s kit lens is so cheaply made, ugh! Also, when I compared a5100 autofocus performance to my beloved X-T1 my jaw just dropped. Reviews suggest that newer Fuji cameras have improved greatly, but still are not on par with Sony.
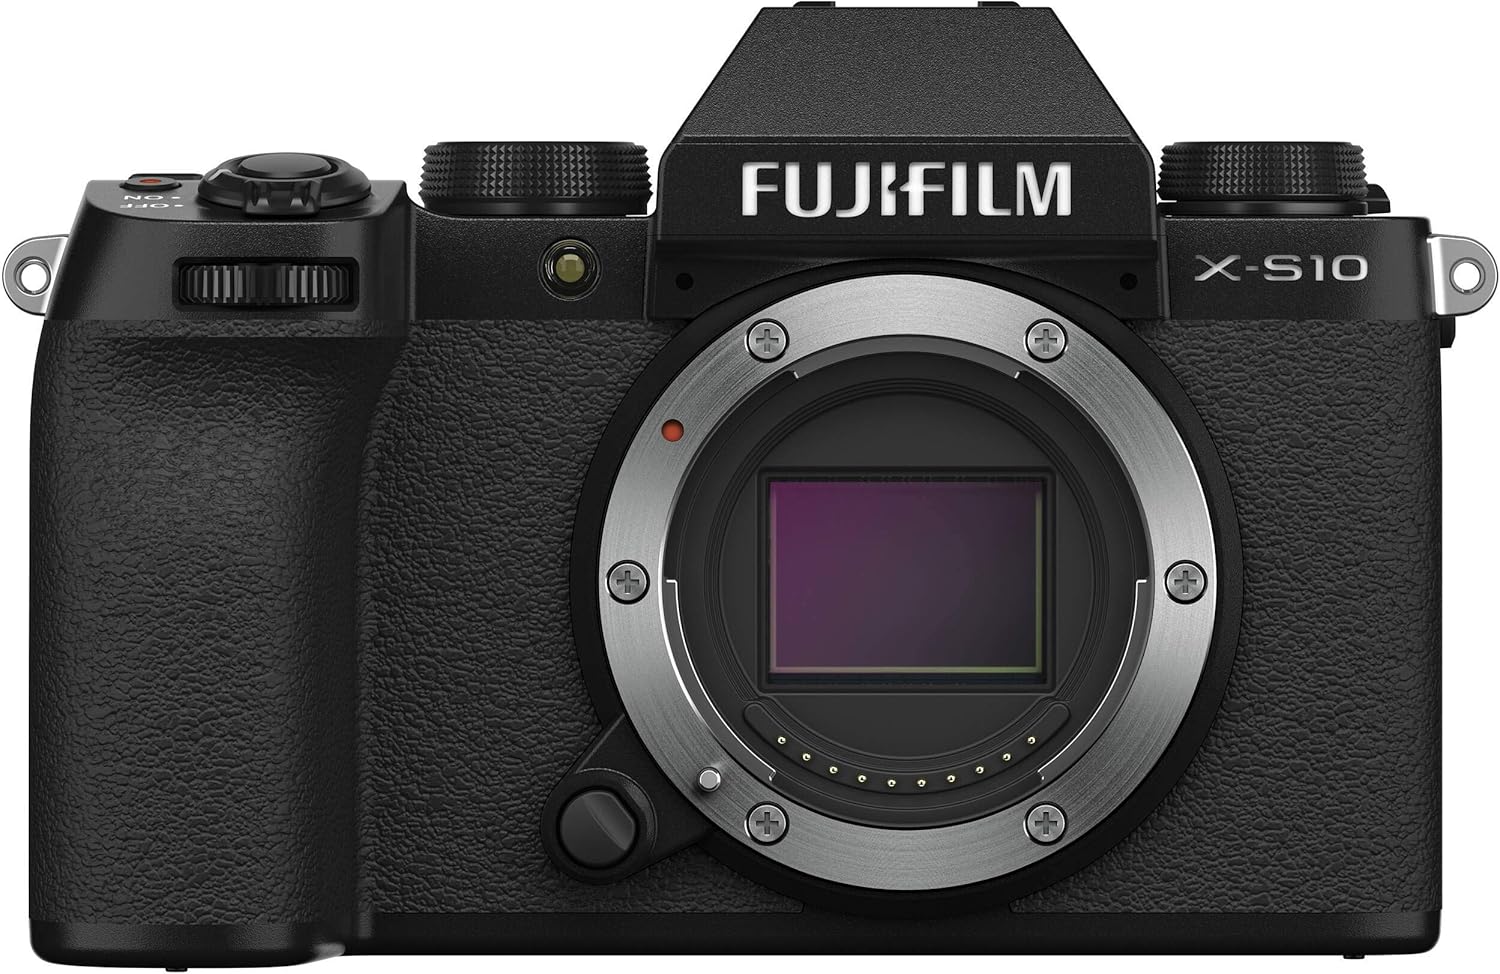
UPDATE. After being unhappy with the fact I sold my Fuji (despite not touching it for years) I decided that if I’m so stuck with my gear obsession, it’s better to satisfy it than suffer with it. So I’ve bought Fujifilm X-S10 and Viltrox 23/1.4, and I couldn’t be happier! First, image quality is much better with more detail. Then, colors are excellent. It’s a Fuji’s strength and I just love them even without color-grading. Plus instead of a dummy battery I just plug USB-C cable in! So I put it on a quick release Arca plate, and within 10 seconds I can have a great camera in my hands. It takes same 10 seconds to put it back on, so that’s really low bar to make a better photo. Also, autofocus is good enough for me, reviews left me with impression that it’ll be much worse. :)
Mount
Of course, you can’t just put a camera on your display. Webcams can do that, haha, should’ve gone that way, right? Tripod is an option if you have a place to put it beside a table, but I don’t. So I watched some YouTube videos to see how people mount cameras to film themselves and discovered a Magic Arm.
Aside: did I tell you I had to watch a lot of videos instead of reading text to discover everything? No? Now I did. It’s a bit painful, but lots and lots of information are in video format only, and text articles about streaming are hard to find and incomplete. I guess including this one. :-)
Back to the story. I never saw Magic Arms before, but the way they work is magical.
It seems that Manfrotto invented that stuff (can’t find reliable sources, but I recall reading somewhere it was invented in 2008), but now everyone and their grandma are making clones of it. Clones are not even close in terms of quality to Manfrotto’s products (or Matthews Infinity Arm, or other costly brands), but they are cheap! You can get a “decent” one along with a “crab” clamp for around 20-25$ here in Ukraine (and even cheaper on AliExpress). It’s made from aluminum and will die on you if you use it a lot, of course, but the plan is to leave it sitting in place.
So I bought a monitor stand (it was around $30) and put a magic arm there, and a little $4 ball head, and — bam! — camera is looking right at me now.
Microphone
They say that there are three important things in a video, in that order:
- Sound
- Light
- Video
And… did you know that camera’s mic is the worst mic ever? By a weird coincidence — I tried to make a video with Fuji X-T1 a few times — I already knew that. They pick up weird frequency profiles (to a point where I can’t listen to my voice from those mics), and they are noisy as hell. My MacBook’s mic array is vastly superior to a camera mic! As you can guess to make all that feel more real I need an external microphone.
I knew next to nothing about mics, and I didn’t just want to buy a Blue Yeti because it’s a layman’s choice. Plus I had an audio interface with XLR input and a 48V phantom power1. So I went to read and watch some videos on mics and after some point stumbled upon Neat Worker Bee — see review at Podcastage (which is the one of two channels I liked about audio, the other being Curtis Judd).
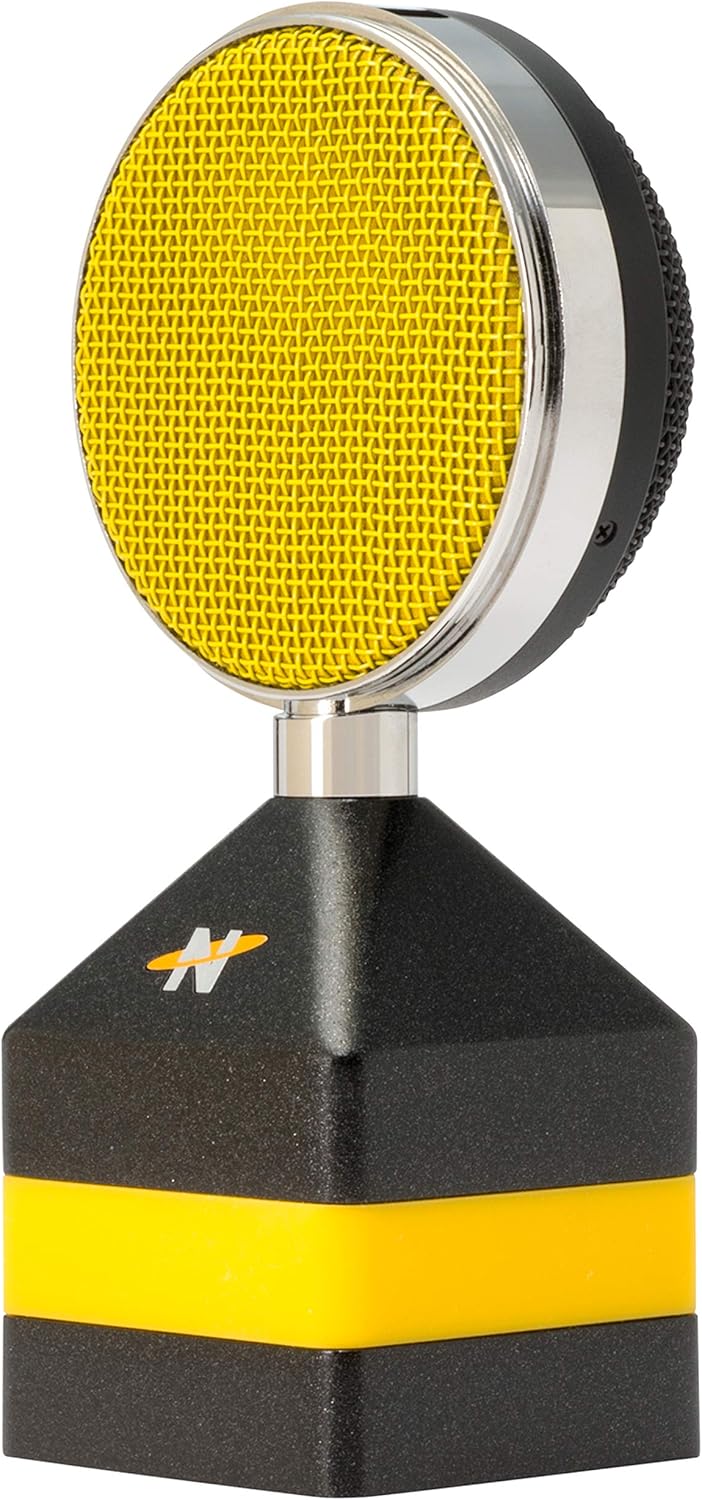
It turns out Neat Microphones were a subsidiary of Gibson and made some upper-class mics: like Worker Bee for $200 and King Bee for $300. But after Gibson’s bankruptcy Neat’s CEO (and maybe some others, IDK) was able to buy it out. That CEO — Skipper Wise — is also one of the founders of Blue Microphones. So Neat Mics are independent now and decided to change their pricing strategy. Unfortunately, King Bee is not produced anymore, but Worker Bee is sold for $90, which is a steal! It has loads of glowing reviews on YouTube and the design… it’s funny, and it’s different, and I just like it. Too bad that it’s mostly black from the back (especially sitting in a cradle), so it’s a bit less interesting in a captured video than I hoped. But I bought one anyway.
Other big brands you probably know of — like Audio-Technica and Shure — are great as well. There are some other great companies I’ve never heard of before, like RØDE.
Various tests say that your listeners won’t be able to tell the difference if you have any mic costing from about $100. Do whatever you want with that information.

UPDATE. I really liked Worker Bee, both it looks and sound, but an appartment with small children is an unsuitable location for a condenser microphone: it picks up too much of a background noise. Dynamic microphones are much better at that, so I switched to RØDE PodMic. I like the sound of Worker Bee more, but slightly worse sound quality is an acceptable payment for the peace of my mind. Also, while not as intriguing as Worker Bee, it certainly doesn’t look dull. Along with a yellow cable on a stand I think it provides nice direction to my face composition-wise.
Sound processing

I mentioned that I already have an XLR interface to drive the mic — it’s Presonus AudioBox 22VSL. It’s a good interface with reasonably good pre-amplifiers. Can I complain? You bet! I’m an expert complainer2!
And the main complaint is that it’s just an audio interface. Let me elaborate.
There are a few things you could do with your voice: de-noise, compression, and equalization.
De-noise is self-describing, but important: when you stream, your laptop is going to make a lot of sound spinning coolers. This generates a lot of background noise which tires your listeners. What’s more important, it drives me mad. This could be done in a simpler way, like noise gate — just silencing signal under some volume level, and in a more intelligent way, learning noise and then trying to clean the whole duration of a recording.
Compression is a really interesting way to improve voice signal: make quiet sounds louder and loud sounds quieter, “compressing” your sound volume to some middle level. This is good because then your distance to the microphone becomes less important, and what’s especially good — changing distance to a mic is much less pronounced, with a volume level being more stable.
Equalizers are used for two purposes. First is altering the perception of recorded voice — add lows to make it sound fuller, remove them if it sounds “muddy”; add highs to make it airier, remove if it cuts your ears; alter mids for better understanding; you know, usual equalizer stuff. Another one is that mics are not perfect and the recorded voice could have some irritating frequencies. Go see Curtis’ video on that — it’s pretty interesting, but it’s a bit too hard. I tried looking at my recordings but it feels like it needs someone with a trained ear. :)
There are two ways how to do those things: either you’re doing that on your computer or it’s done in a DSP of your audio interface. DSP is vastly superior, of course: it does not add latency, there is no additional load on your CPU, and last, but not least, all your audio receiving apps will receive same processed sound, be it OBS, Zoom, browser or anything else. But, of course, 22VSL has no DSP — it’s just an audio interface! So I have to do all that in software.
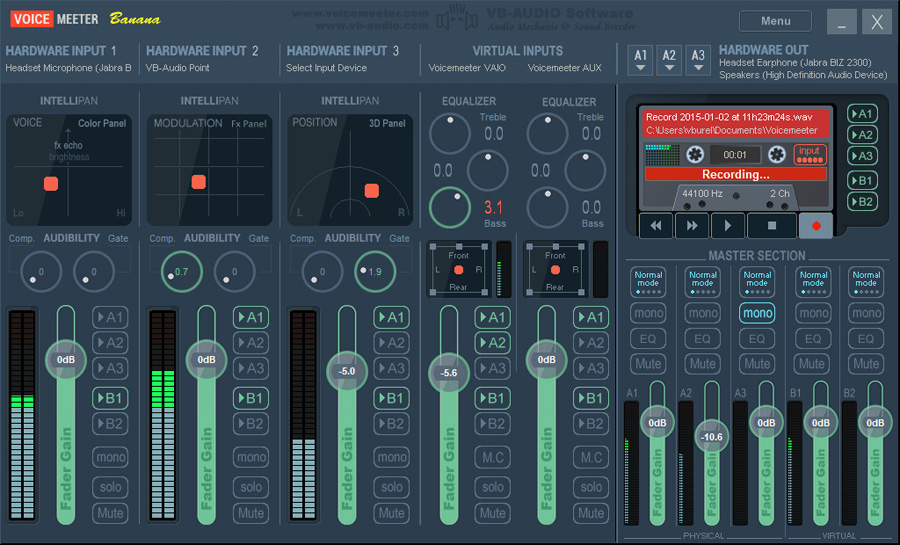
For software let’s look at Windows side first. There is an app for Windows called VoiceMeeter Banana, which replaces the system mixer and allows you to do all the things you want — compressor, eq, even some de-noising. And then silently sits in the tray. Nothing like that exists for macOS! Every article on the web tells you “get a DAW and put a sound through there”. DAW is something like SoundForge or Cubase or Ableton Live or Reaper. All of them are pretty expensive (Reaper is cheapest from 60$), eat a lot of memory, have highly cryptic interfaces, and are not resident apps. Each and every one of them thinks it’s the main app of your life, eating like 10% of a core just to sit there. Ugh. GIVE ME BANANA!
Hardware way

I found two interfaces with DSP under $500: Yamaha AG03 (and AG06) for $170 and Steinberg (which is also Yamaha) UR22C (UR24C etc) for $250.
Yamaha AG03 has a 4-line equalizer and a compressor, but no de-noise, which is a shame. I guess there is a reason why eq is only 4-line and not like 30-line, but this feels underwhelming. Reviews say that pre-amp could be better there… Steinberg looks like a more conventional interface, and has a few amplifiers emulation built-in (for guitars), but just a 3-line equalizer (what). Reviews on their audio quality are also not glowing, and some reviews on Steinberg complain that it’s not working with top AMD chipsets (X470/X570), so it’s not all sunshine and rainbows.
Alternatives from other manufacturers include Behringer XR12 and Motu UltraLite mk4, which are more professional-grade devices and their size doesn’t let me splurge on that.
There is UAD Apollo Solo for $700, and it’s small, but 700?! Is it that hard?!

RØDECaster Pro for $600 is widespread among professional streamers. It gives you 4 XLR inputs and Bluetooth connectivity so you can get someone on the phone into your stream. There are DSP and equalization presets — but no way to customize them, which is a shame.
There is also a highly popular TC Helicon GoXLR, which does all processing in software. It’s not useless though: you can assign apps on your PC to faders and have hardware control of their volume. So you can regulate your voice, music, game sounds, etc — very effective to manage what your viewers hear, right on your desk with a nice tactile feedback. But it doesn’t work under macOS!
I guess you can see I’m in search of a solution, so if you have any suggestions please let me know — I even made a Discourse for comments (see after the post).
Light
I just can’t stop here. Like, I’ve had two points out of three crossed, is it possible to stop? But light is the hardest one because it’s much more about the physical world than anything else. It depends on your room, ability to place stuff around, and it can change anything drastically. Also, you can compare a camera to other cameras and buy the one you decided on, you can do the same with a mic, but with lightning, the specs of light you buy is not going to be the main thing. The main thing is placement. Tutorials say you have to have three different light sources: a key light, a fill light, and a back light.

A key light is a bright source of light that should light up your face somewhat from the side so that you have some shadows. I put a Yongnuo YN300 right behind my camera.
A fill light should be less bright, its purpose is to reduce the harshness of those shadows on your face. I have a small lamp from the other side of my display which I reflect from the wall.
And a back light is something to highlight you from a back (surprise!) to add a feeling of depth to the image. I don’t have a back light and my image is a little bit too plain because of that. I’ll have to fix that.
There are also so-called practical lights, whose purpose is to add interesting points to your background so it’s less dull. This starts to feel like I’m going too far, though, I’m not a “real” video maker yet but geared up as hell already, haha.
Various
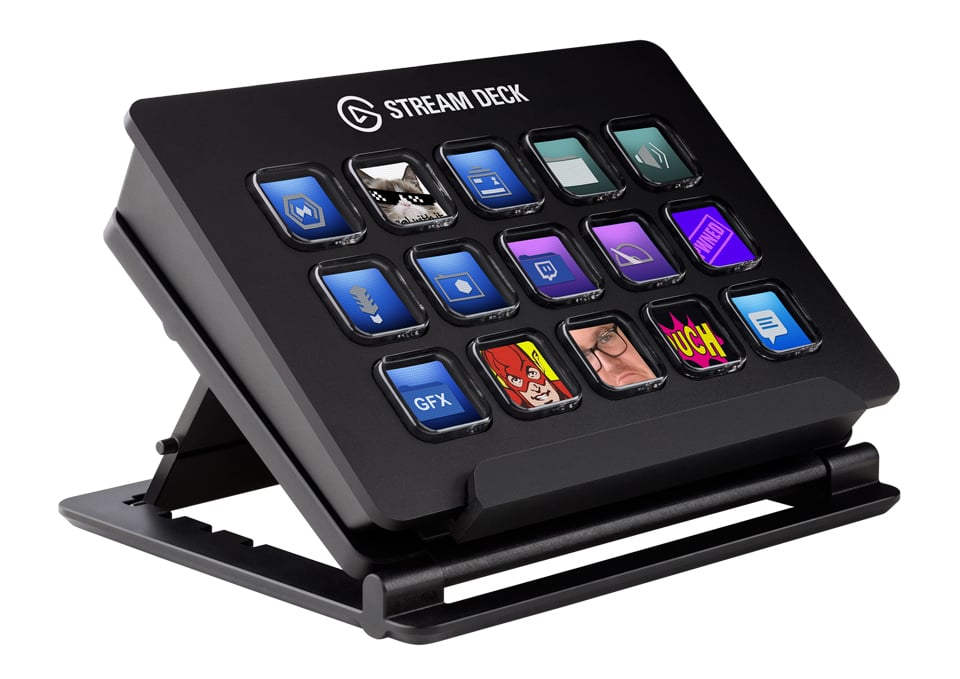
There is also some streamer-oriented hardware I’m not very excited about, like Elgato Stream Deck. It’s a keyboard with LCD screens under each key, where you can put various actions and sequences of actions (“macros”). So it’s like Hammerspoon + Optimus Maximus. The only reason I’m mentioning it here is to tell a story of how Ecamm Live can switch screen configuration presets either from the app interface or by installing a plugin to Stream Deck. No AppleScript, no global hotkeys… it’s like someone has a blind eye on power users? Anyway, good for Elgato, its product seems to be really popular.
The same Elgato has an interesting mount system, but it’s not only not sold in Ukraine and costs considerable amounts of money, but also is constantly out of stock.
Those Elgato people seem to be the most successful company oriented on the streaming market. Their Key Lights are also good, plus the software is excellent — you can control them from your phone.
I also feel like I need to link a few channels I liked (that talk about streaming) - EposVox, Alpha Gaming and Tom Buck. I’m sure there are other sensible channels, but those are that I stayed with.
Software
Default app for streaming is OBS. It’s an open source software, so it’s free and full of capabilities, but, traditionally for open source, interface leaves much to be desired. So I decided to try out Ecamm Live, which costs money (subscription!), but is much nicer to use.
Particularly around multi-person presentations! We did an online meetup using Ecamm Interview: you start the app, it gives you a link to share and other people (up to 4 of them) can open that link and appear in the app as sources. Controls for configuring how you are displayed (side to side, picture-in-picture, only somebody) are excellent!
The way you can do that in OBS is to install obs-ndi plugin, then configure Skype to stream there (because Skype supports streaming over NDI), and then spend eternity resizing sources on your screen.
Of course, I have a few complaints for Ecamm Live. I mean, that’s the curse of computers — even if you try to do something in a best way possible, there will be someone to complain. The first one is that there is no support for VST/AU plugins. OBS allows you to process your sound, Ecamm wants you to use external software. That would be OK if there were something good available but ARGH. :) Another one is price, but that’s because I wanted Live Interview — in that case the cost is 40$/month. And the fact that you can setup multiple scenes (like just you, or just somebody, or two people together, or an intro screen), but you can’t switch between them without activating Ecamm. No global hotkeys, no AppleScript support… this looks like an oversight, really. :\
Streaming
Now that I told you the gist of what I learned over a few weeks (I’ll try to add more information, it’s hard to extract knowledge from a human brain), let’s get to the point of all that — streaming.
I did some. It doesn’t feel satisfying though. I know that to get some audience you have to persist, but the content should be interesting as well. 5 viewers suggest it’s not yet.
I still feel the itch to produce some video content, but I guess it shouldn’t be live coding. It’s not exciting to watch some guy trying to figure out what the hell is going on with that SHA1 calculation for 10 minutes. Maybe diving deep in some bigger project would be more interesting, but I’m not involved in a big open source right now, and showing innards of Kasta is something I’m wary of.
Now my idea is to do a few (shorter) videos on various technical/programming topics. Stay tuned, subscribe to my channel to get notifications, etc.